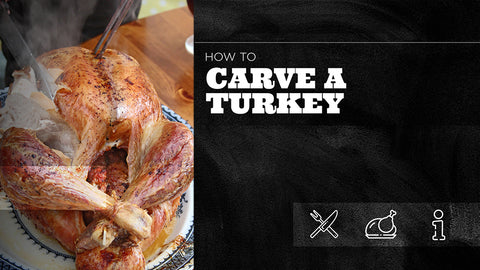
Carving a turkey can be an intimidating step, but it doesn't have to be when you know the easiest way to accomplish the task. We will share our method of carving the turkey and plating it so that your holiday meal is as beautiful as it is tasty.
What You'll Need
There are a couple of things that you should have on hand before starting. You will need a large, very sharp knife. You can use a carving knife if you have one, but a boning knife like this one from Victorinox will work perfectly. A good chef's knife will work, too. Some people prefer electric carving knives, but we aren't big fans of them.
You'll also want a large cutting board big enough to put your turkey on. One of the tricks that we use is to put a kitchen towel underneath the cutting board to help keep it from moving when we are carving. Have your serving platter on hand because you'll want to serve the bird as soon as possible once it is carved because it will get cold quickly.
How to Easily Carve a Turkey
After roasting, frying, or smoking your turkey, you'll let it rest. Resting the turkey is essential to allow the meat to reabsorb juices. If you carve the turkey right after cooking it, you'll see the juices running onto the cutting board, but if you rest the bird, the juices will remain in the meat. The turkey should rest for 30 to 45 minutes. Use this opportunity to get your cutting board ready, put a quick edge on your carving knife, and make sure your platter is ready.
How to Carve a Turkey: The Simplest, Easiest Method
There are two basic ways to carve a turkey. The first way is to carve the entire bird at once. If you are only serving a small group of people, you can just carve one side. Some people prefer to carve one side then the other side. There is nothing wrong with either way but typically, we carve the entire turkey at once.
Start by placing the cooked and rested turkey on the cutting board. You'll want the breast side up and the cavity facing you. Grasp one of the legs and gently press it toward the cutting board, then use your sharp knife and make a cut from just below the breast meat toward the inside of the thigh. Try and use one smooth stroke and gently pull the thigh to expose the joint. Use the tip of the knife to separate the thigh from the body. Repeat the same process for the other side.
The next thing you will do is remove the wings. These are really easy and may just about pop off on their own. Like the thigh, you'll want to press down on the wing and slice the knife through the skin to expose the joint and cut through it. Do the same thing on the other side.
Finally, you will remove the breast meat from the turkey carcass. Use the tip of the knife to slice between the two sides and press the knife downward, lifting the breast meat away as you make the cut. Repeat on the other side, then slice the breast meat across the grain into thin strips. This allows each piece of breast meat to retain a beautiful bit of delicious skin.
The last step in the process is to remove the drumstick from the thigh. Flip the piece over so that the skin side is down and use the tip of the knife to carefully separate the drumstick from the thigh bone by slicing through the joint. You'll do the same thing with the wings, removing the drumstick from the wingtip. Some folks like the tips even though there really isn't much meat on them. We usually save them and add them into our bone bucket for making turkey broth.
Arranging the Carved Turkey Meat and Serving
There is no wrong way to arrange your turkey on a serving platter but that doesn't mean that you should just dump it all on the plate and call it a day. What we like to do is place the sliced breast meat together with a carving fork to serve and arrange the wings, drumsticks, legs, and thighs on either side, almost like a deconstructed turkey with all the meat in one place. The goal is to make it easy for your guests to get the carved meat they want easily.
Final Tips
Properly carving a turkey is a simple process that is easy to master. You'll look like a pro when you are able to properly carve a turkey and plate it beautifully. The best tip that we can offer you is to start with a very sharp knife and use long, smooth cuts rather than sawing at the turkey to get the best results.


